This page explains how to use the viewer. When it is not working as expected you may need the troubleshooting page.
Llv supports a number of commandline options. When started with commandline options specified, llv will attempt to start
the video stream(s) right away. This way, it is possible to start several receivers in a single process automatically.
When started
without parameters a dialog pops up. This is the normal mode when starting it from a GUI by clicking the icon.
From 0.0.10 the
following commandline is accepted:
| llv | [-f filename] [-s stream_type] [-u username:password] [-b borderstyle] [-p] [-a] [-x] [-h http_port] url | address [ [parameters] url | address ] ... |
| -f filename |
(optional) Filename to use for saving state. When this argument
is used it must be the first one and it may occur only once. State from the file will be read
and can be overridden with the remainder of the commandline. When
no file is specified, llv.rc will be looked for in the directory
where the executable resides. Note that the state file has security implications making the tool unsuitable for certain uses. When the program stops, the statefile is overwritten. It also includes screen locations. Next time the program is started with this file as argument, all parameters from the last run will take effect and are not needed on commandline. You can use the state file to implement a poor mans videowall.
|
| -s stream_type | (optional) What type of transport to use. Choose from udp, udpm and tcp. The
default is 'tcp' to increase the chance of actually receiving video
through a firewall In case of udp (unicast) or udpm (multicast) a socket buffer of 128Kb is created, as especially on Windows the default buffer is too small |
| -u user:pass | (optional) Credentials to use. The default is 'root' and 'pass'. Digest authentication is used if the remote device offers the option. Note: credentials are stored in the statefile in plaintext. |
| -b borderstyle | (optional) How to display a border around the video. Currently the options are 0 for none, and all other values give a standard window decoration. -b 0 can be usefull to restart a bunch of streams after you have manually arranged them on screen. There will be no GUI to change the windows as there is no border providing any controls |
| -a | (optional) Autostart. Usefull in combination with -f and no other parameters. Despite the lack of details on the commandline, the tool starts right away displaying the streams from a previous run |
| -p | (optional) PTZ control. When an Axis PTZ keyboard is connected it can be used for PTZ operation. Mouse is not supported. |
| -x | (optional) Analytics overlay. Presence of a number of supported camera analytics is tested, and when found the overlay information will be requested and rendered in the video. This is implemented for a limited number of analytics, and most only partial: Axis VMD, Axis contentstream, Axis Demographics Identifier, vTrack ATM, IPS Loitering. |
| url_or_addresses | An RTSP URL or one or more IPv4 addresses, which will be expanded to video-only Axis RTSP urls
like:rtsp://a.b.c.d/axis-media/media.amp?audio=0Alternatively one can specify an entire RTSP URL. This allows to connect to other brands. First IP address needs to be specified completely. Next one(s) need only contain the relevant least significant bytes. Examples:
|
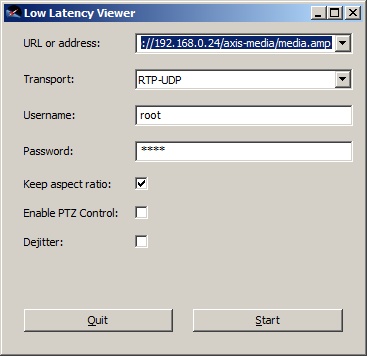
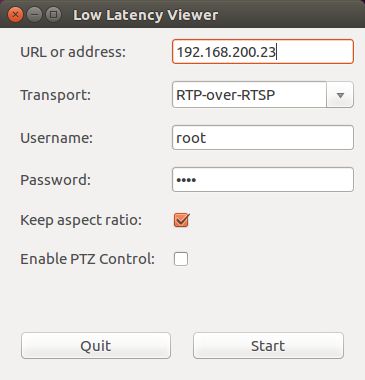
Startup dialog
After this introduction the graphical interface is mostly self-explanatory.
The features are a subset of what is provided on the command-line:
 |  |
| Keep aspectratio | Enable this to select Fill inside scaling |
| Enable PTZ control | Enable this allow PTZ control using a joystick. Only works when a joystick is connected and the camera happens to be an Axis camera. Mouse-based PTZ control is not supported. |
| Dejitter | Attempt to respect capture times during playback by introducing a small amount of latency. As of version 0.0.9, this feature is not finalized and can only compensate for limited jitter |
Video window
Keyboard shortcuts
While the video is playing you can use the following keyboard shortcuts:| s | Save a bitmap in the current directory. .BMP on Windows, .XPM on
Linux. The bitmap is taken after scaling is applied and overlay
blended in.Unfortunately, the saving task isn't managed very well and the video display stalls during writing of the file. |
| J | Enable the dejitter-function |
| j | Disable the dejitter-function |
| p | Simulate loss of next P-frame |
| i | Simulate loss of next I-frame |
| d | Simulate loss of 70% of next I-frame |
| L | Toggle logging of dejitter statistics. Logging is written to stdout, so the program must be started from the commandline in order to see it |
| Alt-Shift-S | Open a less-than-perfect dialog that shows framerate and framedrop measurements. |
| q | Close the video dialog |
| Q | Close all video dialogs and terminate application |
State indicators
Several status indications are overlayed in the video stream:|
Stream is not playing anymore. Reconnection attempts are in progress. Normally this icon shows in combination with one of the others. If the stream hasn't played yet it is likely the device is not reachable or the credentials are incorrect. Reconnection attempts are performed every 30 seconds allowing you to fix problems on network- or camera side after which it will eventually restart by itself | ||
|
The decoder received data it couldn't decode. When this
condition lasts for a few frames in a row, so data is received but is unuseable, reconnection will be attempted. When it happens more frequently you might want to read the page on getting packets from A to B. | ||
|
An unexpected RTP Sequence id was received, normally
meaning one or more packets were lost. Packet reordering isn't
handled yet, so in routed networks this icon may show while the
stream is actually correct (but can't be decoded as it can't reorder)
| ||
|
One or more frames were dropped internally. This happens when internal queues fill up while data comes in faster than can be processed. This is one aspect what makes it a 'low latency' viewer. Frame drop may happen at several places in the processing chain:
It's not always that the PC is too slow. Some networks show a tendency, mostly with TCP streams, to buffer packets and forward a lot of them at once. The effect is that four frames come in at once. This is the reason to buffer four frames between decoder and scaler. Obviously such a stream needs the dejitter function to play nicely. When five frames come in in a row, the speed icon will appear because of the frame drop.
| ||
|
No data was received for one second longer than expected based on the SDP description. When the situation doesn't cure by itself a reconnection attempt will be performed and the general error icon shows.
| ||
|
|
RTCP Server reports from camera hint at a time offset between camera and receiver of more than 100 milliseconds. The most likely cause is the devices not being synchronised to the same NTP source. Even without RTCP the receiver still tries to dejitter based on a clock-drift estimating algorithm (which doesn't work too well). To get rid of the icon NTP-sync needs to be taken care of. Disable the dejitter function to get rid of the icon without fixing NTP. (version 0.0.11) |
Render setting dialog
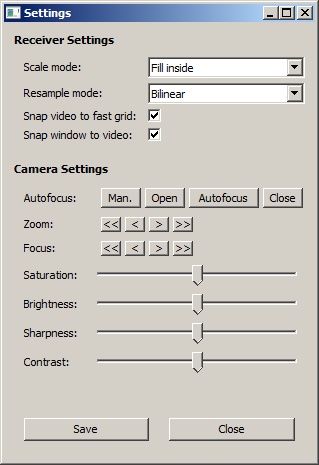
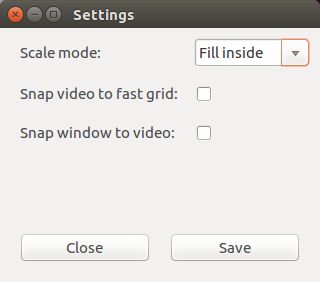
Right-click the mouse to pop up a window where some rendering settings can be adjusted:
 |  |
After changing rendering settings it is necessary to manually resize the window a bit to activate them (version 0.0.4)
| Scale mode | Fill inside: maintains aspect ratio and keeps all video inside
window
Fill outside: maintains aspect ratio and fills entire window Fill both: keeps all video in window and fills entire window. Aspectratio is not respected, depending on window size No scale: does not scale the video. Lacking a means of navigation this setting isn't very usefull at this stage. |
| Snap video to fast grid | Maintain a video width which is a multiple of 16 pixels. This way the scaler can make effective use of SSE instructions and a considerable reduction in CPU useage may be observed. When this setting is active a border may be noticeable around the video unless you carefully tune the window size or use 'Snap window to video' |
| Snap window to video | When enabled, shortly after resizing the window will be resized to exactly fit the effective video size. |
| Camera Settings | The rest of the dialog is Axis-specific. The buttons can be used to adjust zoom and focus on supporting models. The sliders for Saturation/Brightness/Sharpness/Contrast will work on all (Axis) models. |
State file
At the end of a run the application writes most of its configuration to a
file. Default filename is llv.rc located in the directory of the
executable, but other names can be specified on the commandline.
The major drawback of the file is that the password is written in the
plain. The advantage is it saves typing especially when
starting a bunch at once. It also saves the final screen locations (after drag and resize), which enables this feature to be used to build simple videowalls.

